For anyone who has ever called me a “hoarder,” or made fun of me for holding on to things I’ll never do anything with…today is the day I totalllllyyyyy redeem myself.
Because yes, I never finished that scrapbook I made for Matt and I’s first year anniversary of dating (and yes, I did wrap it up and give it to him unfinished with the excuse of “we have so many memories left to make!”) and yes, we wound up having a few more boxes during our move because of my inability to let go of my 27 Bonaventure t-shirts and picture frames from my freshman dorm room. And yes, my mom still has boxes in the basement filled with my NSYNC folders, Snoopy book collection, senior prom dress and that weird wax hand thing I made at Canal Fest circa 1998.
But alas! The day has finally come where I can prove my inability to let go of the past as a really great thing. Because, well…I finally did something great with some of the things I’ve been saving.
For those of you who have followed along our running journey know that Matt caught the running bug somewhere around 2011, and I followed suit shortly after (had to keep up with him somehow, and oh yea- they give you free snacks when you finish the race!). Every trip we took and every race we ran was not only a huge accomplishment but also a big time moment for the memory books – moments that last a lot longer than those free snacks. (Okay, I lie: I might still have a pack of pumpkin granola left from the Seattle race in 2012. It doesn’t expire until Dec. 2014!)
And for those of you who run races, you know that there are basically two souvenirs from a race: the bib and the medal. While some people always save their bibs, I happen to be married to someone who a) is not a hoarder and throws out anything unnecessary to daily survival, b) sweats a lot during runs, deeming the bib on his shirt almost unrecognizable by mile 26 and c) really, really focuses on the medals. Like has medals for having a certain number of medals. You think I’m kidding. I’m not.
After each race, when we’re back in the hotel and Matt is inspecting his medal/signing up for another marathon, I am normally inspecting all of my free snacks/unpinning our bibs from our disgusting, sweaty shirts and laying them on the hotel floor to dry out. I need to do this quick, or else Matt’s bib winds up in the trash, covered with banana peels, Gatorade and peanut butter packets and anything else that still litters the room from our early hours before the race. While I am unpinning the bibs (or screaming, “where is your shirt I need your freaking bib!” Matt is usually laughing at me and asking what the hell I’m going to do with the bibs once we get home.
My defense is always the same: “don’t worry about it.” (Much easier than saying, “I don’t have a clue but I will figure it out someday and until then I will go to great lengths to hide the pile of them somewhere in my craft drawer where you can’t find them and throw them out next time we move to a new apartment or new city and you feel the need to step in and organize my life for me.”) Hrmph.
Fast forward to August 1st, 2014. Matt’s birthday was a mere 17 days away and I was still racking my brain for ideas. I had been scheming to make a marathon medal holder for years, but since we’ve always lived in a one-bedroom apartment with no room to possibly “hide” a birthday craft (see “hoarding” reference above), I had failed each attempt miserably. But this year would be different – not only did I have a whole basement floor to cover in Modge Podge, but I also had many-a hours of alone time while Matt was at work and I was in between work assignments. So now the question was…what would this medal hanger look like?!
First I thought maybe I’d buy a big long frame and add race photos and hooks for the medals. Then I thought maybe I would do a cool photo-transfer using my ol’ tub of gel medium from my high school AP art class. (Upon further inspection of said tub, that idea was thrown out right along with it.) Then, after a serious Google/Pinterest/Etsy search of “DIY marathon medal hangers for guys” I stumbled upon this glorious idea on The Hippie Triathlete (now one of my new favorite blogs). And, if you can picture old Peanuts cartoons where Lucy yells “THAT’S IT!” and Charlie Brown falls and rolls on the ground because she screamed it so loud…yea, that’s exactly what it was like.
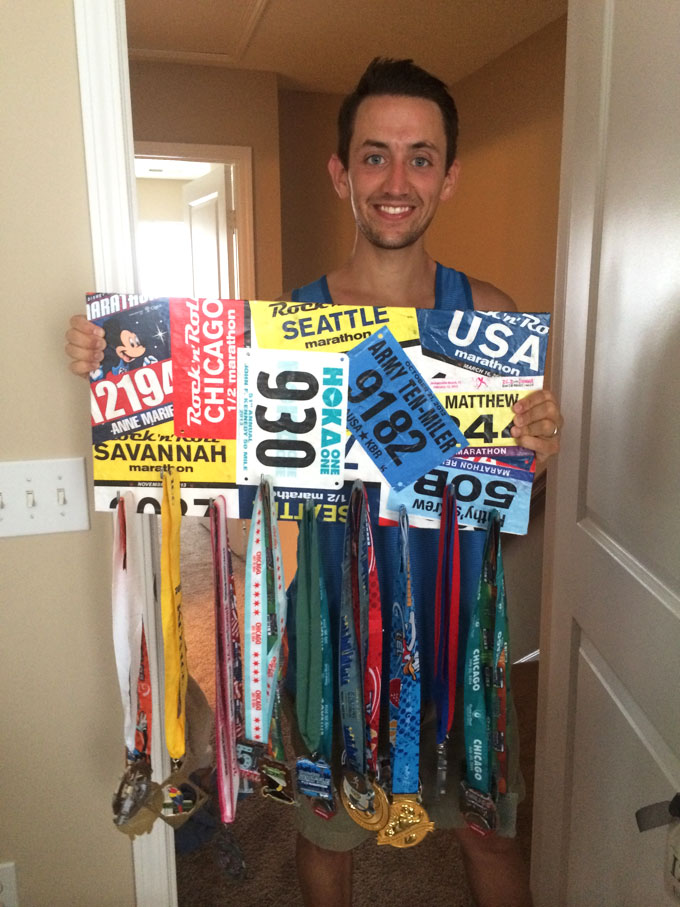
A use for those damn bibs, a place for those damn medals and quite possibly the greatest birthday gift of all time for Matt Izzo. This, mah friends, is how you win wife of the year. And how you become “that girl” at your neighborhood Lowes who tells you “no, I don’t need any help” and then chases you back down the aisle yelling “Actually, I’m making this really awesome craft…”
Shout out to the Lowes worker who handed me a drill bit with shaking hands and asked, “You sure you know how to use a drill?” I want you to know that I appreciated your concern and upon further reflection (and a minor panic attack), I had my brother drill the holes for me. Everyone still has two eyes, two arms and two legs around here. I think. But for next time…y’all offer any sort of power tool classes?
I would also like to point out that besides the scary drilling bit (get it? drill bit?), this project was super easy, super quick and crazy fun to make. You basically let your creative collage-ing self run wild with a sponge brush and Modge Podge. For me, the hardest part (again, besides the drilling) was deciding where all of my collected bibs should go. Oh, AND trying to find one of our Nashville Rock & Roll and Cherry Blossom 10 Miler bibs. Looks like Izzo got his way that time…those definitely wound up covered in banana peels.
Good thing I see many, many, many, MANY more races in our future! I might just have to collage an entire wall next time.
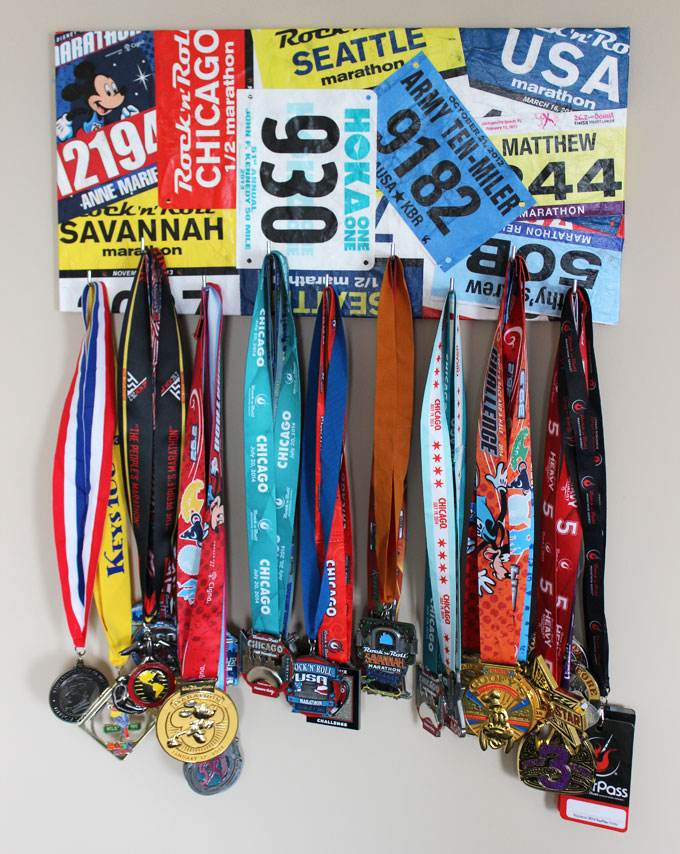
Bibbed-out Marathon Medal Hanger
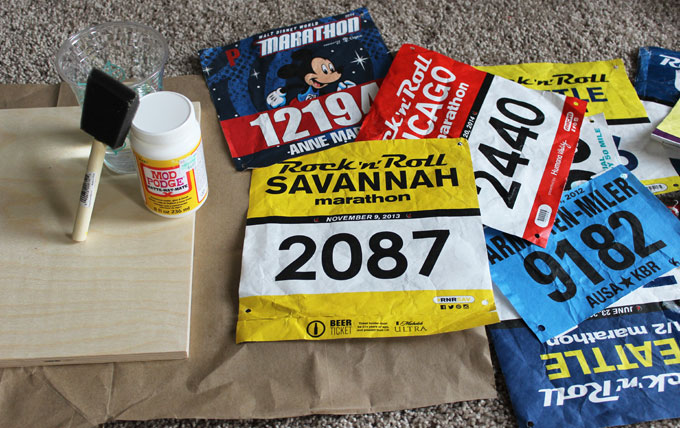
What you’ll need:
- Wood board (I bought mine from Michaels for $5)
- Mod Podge
- Sponge brush
- Race bibs (enough to cover board)
- Glue gun
- L-shaped hooks (I used these – you can buy them in packs of two in-store)
- Drill, fit with a drill bit the same size as your hooks (mine was bout 1/8 inch)
- Self-leveling picture hangers (I used these)
- Newspaper to cover your work surface (I used a cut up Whole Foods bag)
Directions:
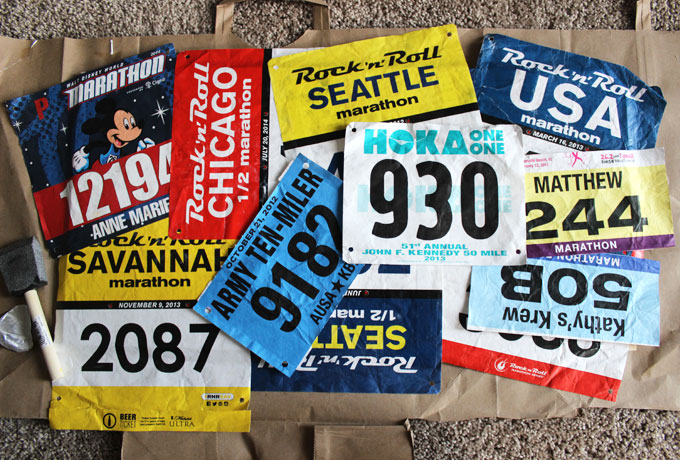
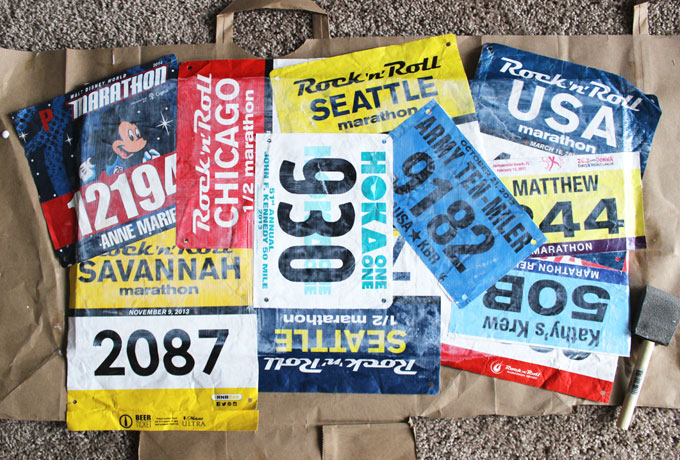
1) Place your wood board down on your work surface and lay out your race bibs in whatever collage fashion you’d like. I messed around with a few different designs, trying to balance the color of the bibs as well as make sure you could see what city/race it represented. I also knew which bibs meant the most to Matt – like the Army Ten Miler, which he first ran with his dad, and the JFK 50 Miler, because well, it was 50 freaking miles.
2) After your collage is exactly the way you want it – TAKE PICTURES. A few of them. Make sure you are confident with putting the bibs back on the board exactly the way you have them laid out now.
3) Here is the scary part: Remove your bib collage from the board. Maybe take one more picture beforehand.
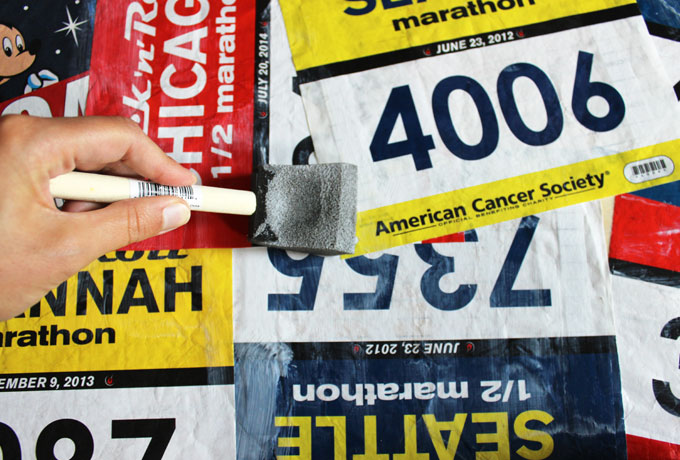
4) Time to Mod Podge it back on! Starting with the bibs that will be layered underneath other bibs, use your foam brush to lay down a layer of Mod Podge where the bibs will go. Then, once you have your bibs set in place, brush another layer of Mod Podge over them, making sure to cover all edges and brush out any air bubbles.
5) Repeat with other bibs, layering them just the way you want for your collage. Again, make sure you brush out any air bubbles as well as seal the edges down well. Don’t worry about the edges for now – we will hot glue them around the board edges once the board is covered and dry.
6) Yay! Collage is set and Mod Podged down. Brush 2-3 nice even layers of Mod Podge over the entire board, leaving time for it to dry in between layers (about 20 minutes).
7) Once your collage is sealed to your liking and completely dry, hot glue the edges of any outside bibs over the edges of the board. This will ensure that your board will look great from all angles. (If you don’t want to do this, you can also cut your bibs to size and then paint a solid color around the edges. Or leave untouched – the wood looks pretty enough!)
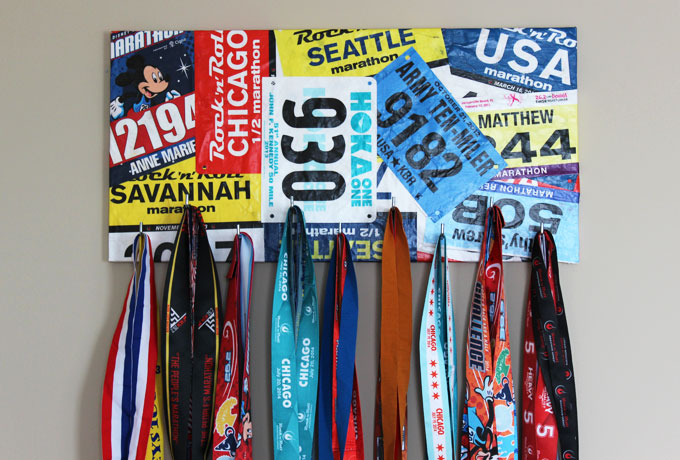
8) Using a ruler, measure out exactly where you want your hooks to be. I wanted two rows of hooks, but you can also do a single row straight across the board. My board has nine hooks, and we measured 2.5 inches in between for each row. (Since I failed math in high school, this may have taken me a solid hour to figure out.) Using a pencil, mark exactly where your hook needs to go – you will use this as your drill mark.
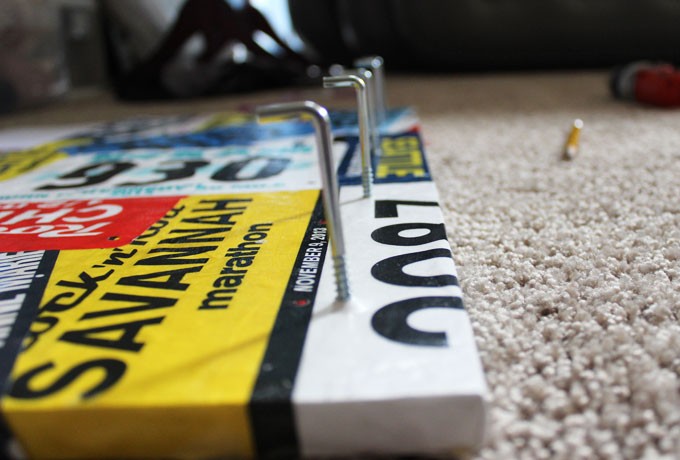
9) Drill time! Using a power drill and a 1/4 inch drill bit (and employing an experienced driller), drill a hole through the board. We found that it was easier to go right through rather than try and leave .2 centimeters left in the board. NOTE: If you are using a thicker board, you can probably just hammer a nail through and then use that hole to srew your hooks into. However, since the board from Michaels was only about an inch thick, using a hammer and nails would have split the wood quite terribly. Therefore, pre-drilling was the only option!
10) Once you have drilled your holes in the wood, take your hooks and screw them in by hand. Starting with the hook placed up, it took me three times around to get it screwed in and in the exact position I wanted it in.
11) Looks beautiful, right!? Now it is time to hammer in the frame hooks onto the back. I used two, placing one in each top corner of the board, about two inches from the top.
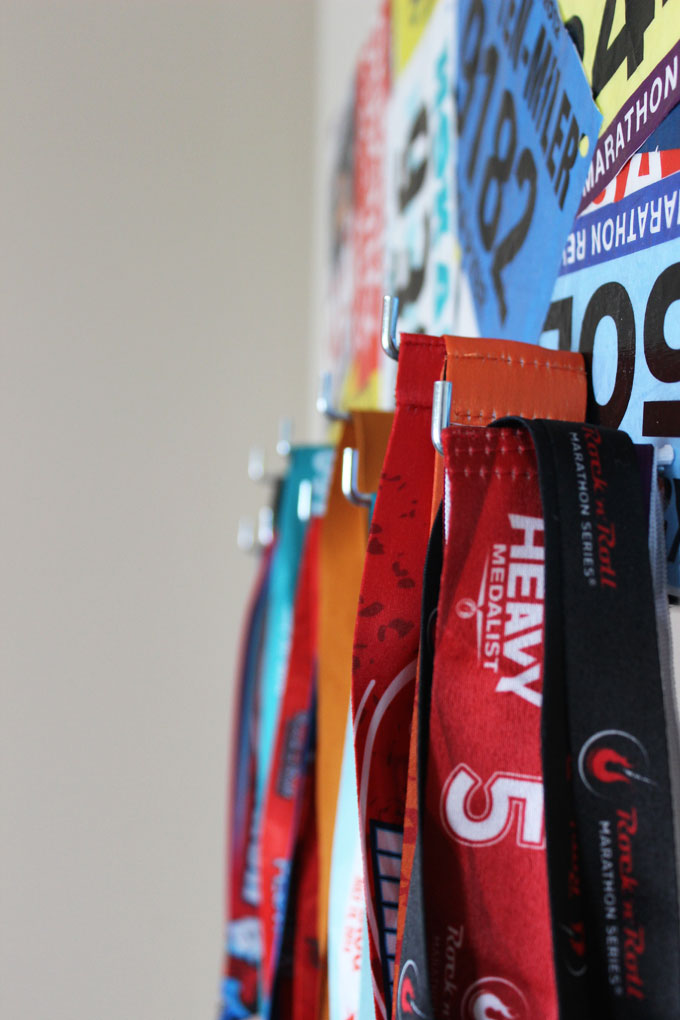
12) Hang on the wall and start filling with medals! You my friend, are a rockstar. And possibly the best wife ever.
One of your new favorite blogs, hooray! Glad you were inspired, and your finished product looks amazing! Happy racing.
Thanks so much Jen! And yes, I’ve been catching up on your blog and I’m so inspired by all of the training, traveling and exploring that you do. Think I’m ready to sign up for my next race. :)
Thanks for the inspiration!!!
I made mine today.
This is AWESOME!
Ah thank you so much Robin! I’m going to have to make another one soon with all these races my husband keeps signing us up for! :)
LIKE THIS
I love this idea! So cool- I’m definitely making one of these.
Awesome Lisa! Let me know how it turns out! :)